Google Analytics is a free web analytics tool from Google that helps you better understand how your website is performing. You can evaluate several aspects of your website including where your traffic is coming from and how users are engaging with your content.
The following eight steps will help you setup your Google Analytics account from the initial creation to optimizing and connecting other Google web tools.
1. Create Google Analytics account
The first thing you’ll want to do is create your account. Go to google.com/analytics and select Start for Free. You’ll be asked to sign into your Google account. Follow the prompts to name your account and accept the terms of service.
2. Install the Google Analytics javascript snippet onto your website
Once you have your account setup, you’ll need to install the javascript tracking code onto your website. This is how the data flows from your website into the analytics account.
![]()
If you have access to the source files of your website, you’ll want to add the tracking code in the
section. This way the tracking code loads each time the section loads on any page of your website.If you don’t have access to add the tracking code to your website, then you’ll want to hire a web developer to do it for you.
3. Setup Three Views: Raw, Testing, Master
Once you have the tracking code installed on your website and you’ve verified that there’s real-time traffic, you’ll want to create three basic views in your account. The three views are raw, testing, and master views.
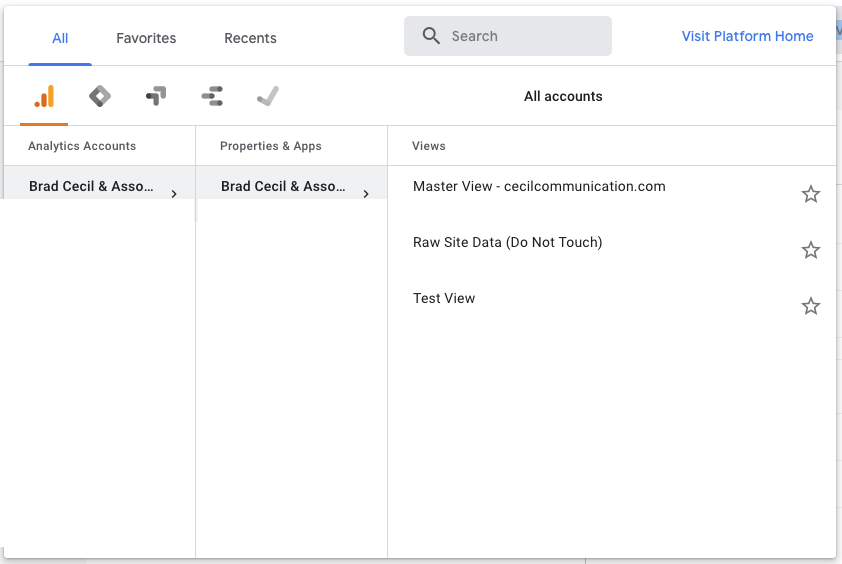
By default, you’ll be given one view when you first setup your account. All data that is collected on the website will flow into this view. As a rule of thumb, you should always have one view that isn’t altered in any way. This is your raw data view.
Creating a testing and master view will give you some flexibility in how you want to view the data in your account. With the testing view, you can apply filters to see how they affect incoming data. Since this is only affecting the testing view, the raw data view will not be affected. If you’ve mistakenly added a filter that didn’t turn out correctly, you still have all the original data in the raw data view.
Once you’ve verified that the filters are working properly, you can apply them to the master view. The master view is the view that you’ll be looking at the most, so the data needs to be at its best in this view.
You can create more views based on your organization’s needs. If your website has an option for users to login, you can capture the user’s journey while they’re logged into your site. This might be labeled as a membership view. Of course, you’ll be testing different filters in the testing view before verifying that the “membership” data is correct and applying those filters in the membership view.
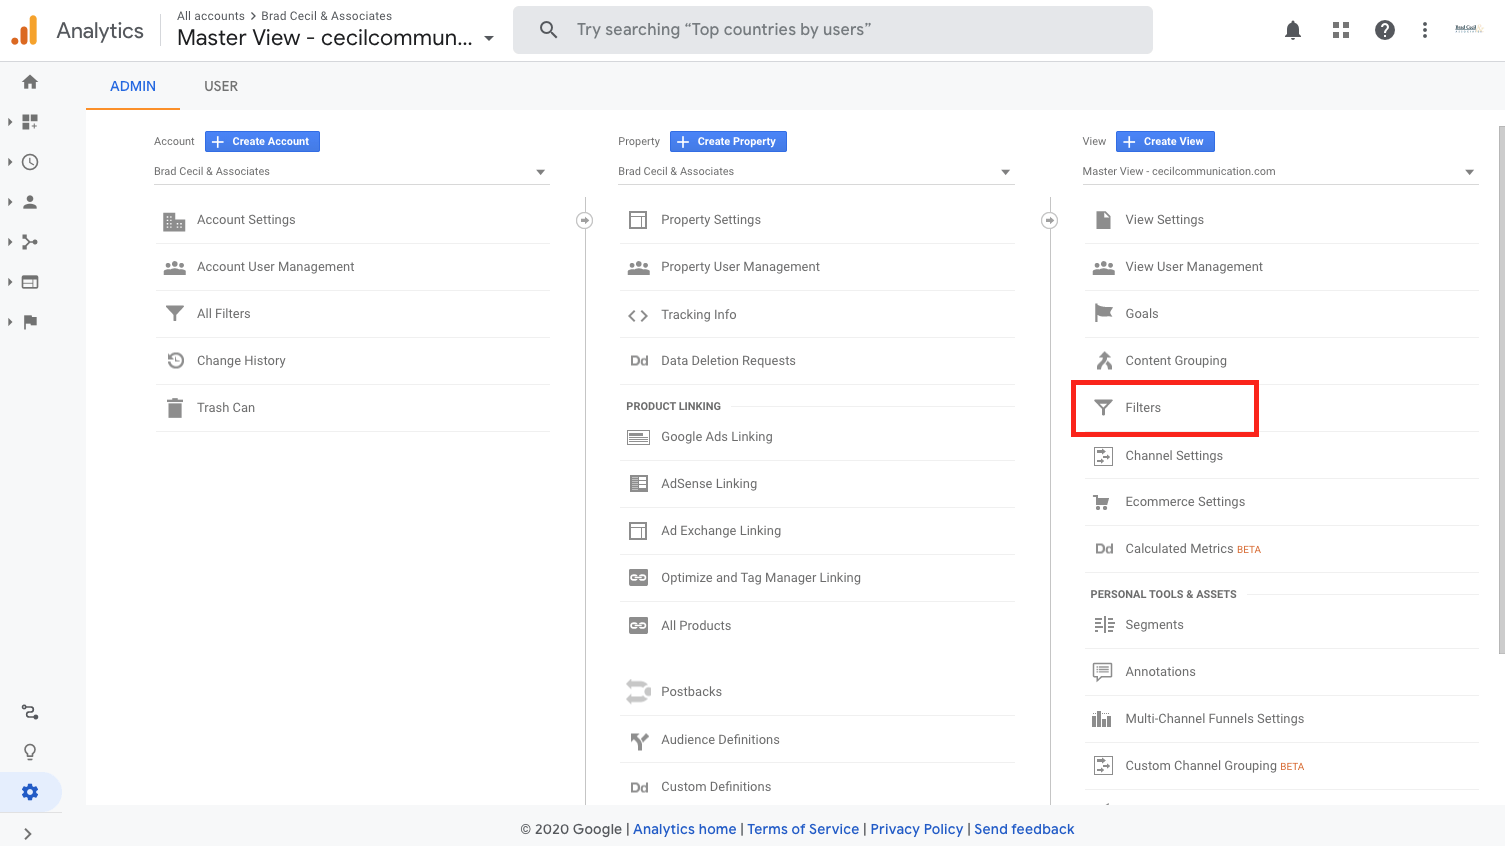
4. Add Filters
Filters are a way for you to limit or modify the data within a view. As mentioned above, you’ll have one view that contains all the raw data as a backup. This one will not be touched. Use the testing view to test out different filters before applying them to your primary master view.
For example, you can add a filter to exclude hits from your own IP address when visiting your website. The interaction will still be listed in the raw data view, but will be filtered out in the master view.
Google Analytics is case sensitive when collecting the data. If someone visited yourdomain.com/article, but then someone else visited yourdomain.com/Article, these two interactions would be recorded as separate pages.
For this instance, adding a lowercase filter on the URI would force all the data into lowercase.

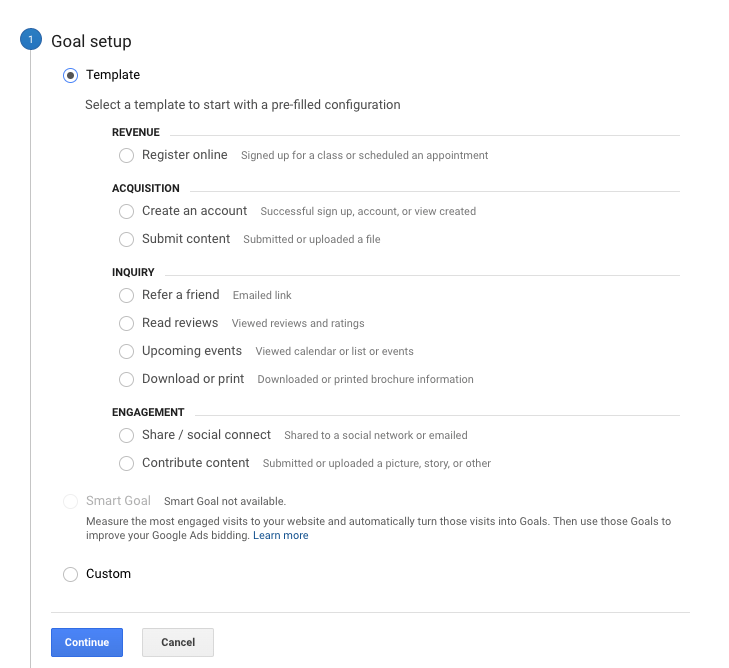
5. Add Goals
Now that you’re able to view your data is an efficient way, you’ll want to set up goals. Navigate to Admin > View – Goals
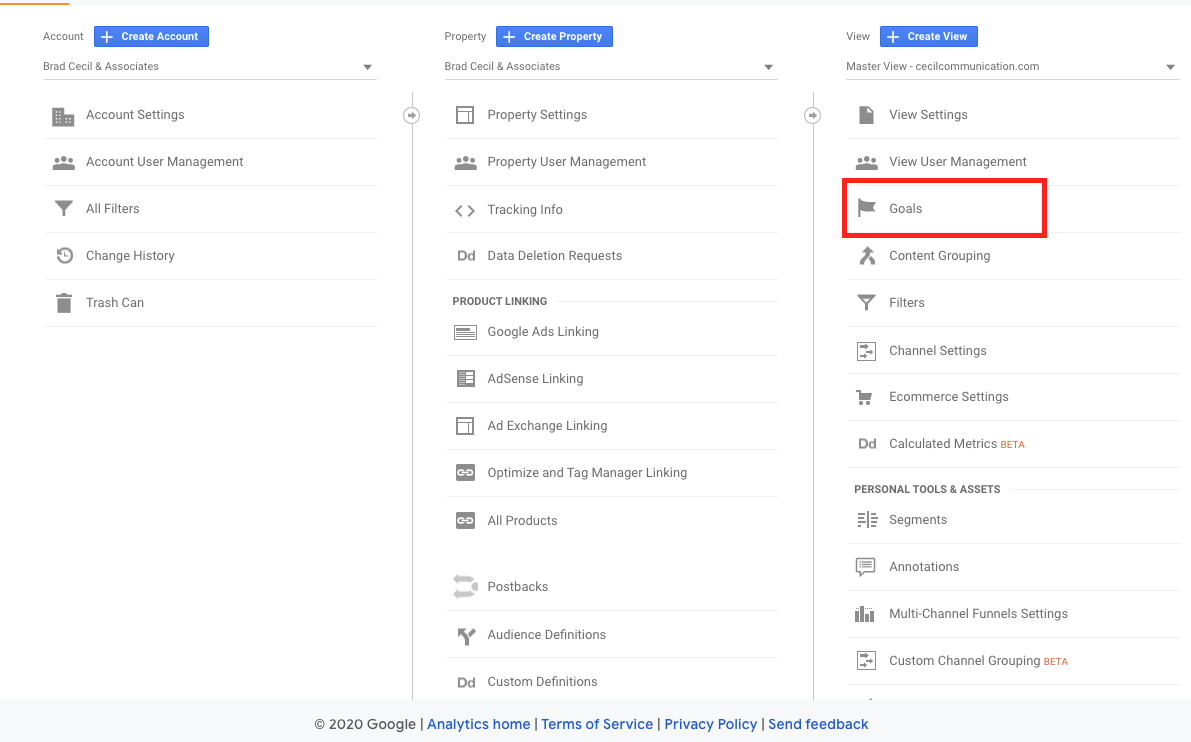
Some examples of goals that you can create are Register Online, Create an Account, Download or Print, Share / Social Connect or Custom Goals.
A custom goal includes setting up a Thank You page to be viewed when a user completes a donation.
6. Connect Google Search Console
Google Search Console (GSC) is part of the Google webmaster tools that help improve your performance on Google Search. GSC tools and reports help you measure your site’s search traffic and performance. They also alert you to any issues on your website by identifying which URLs are being affected by these issues.
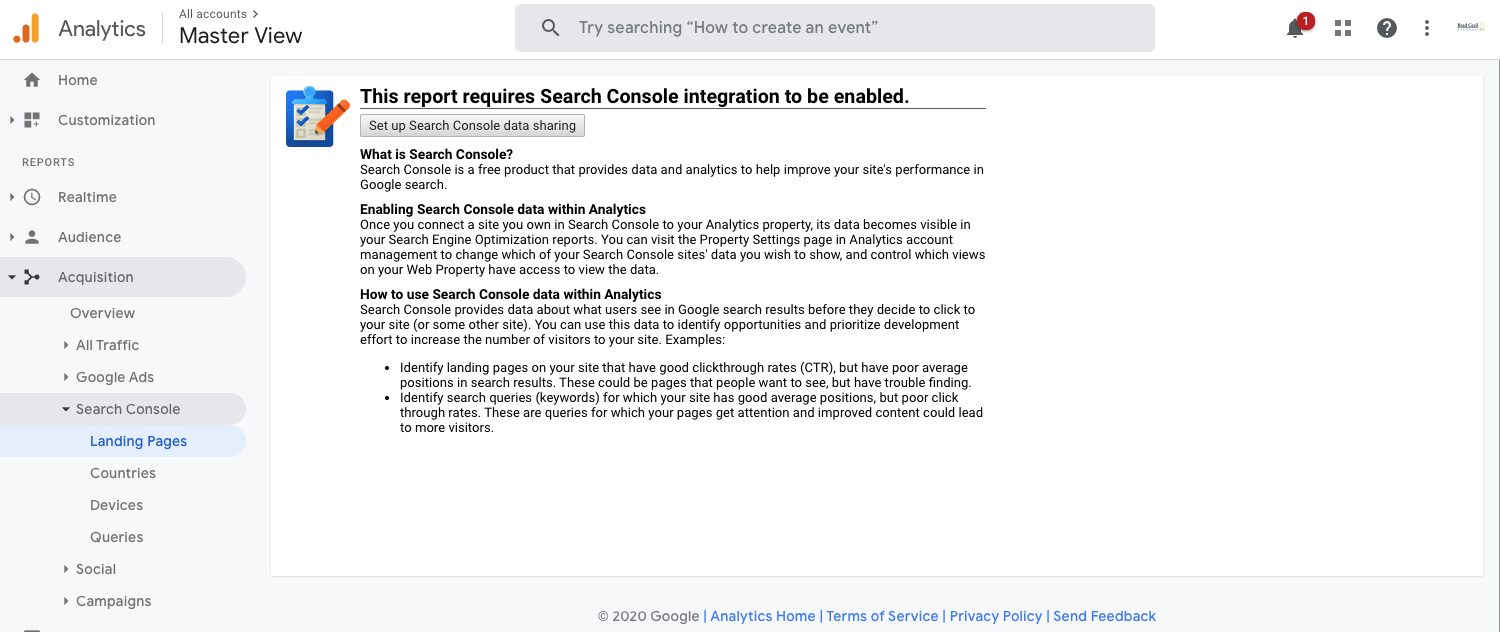
If you haven’t connected your GSC to your Google Analytics account, then, when you navigate to Acquisition > Search Console > Queries, you will see this message below:
If you haven’t already created your GSC account, you’ll want to get started by creating it first. Go to https://search.google.com/search-console/about and select Start Now to get started. You will need to verify your domain with HTML file upload, DNS record, Google Analytics tracking code or one of the other options.
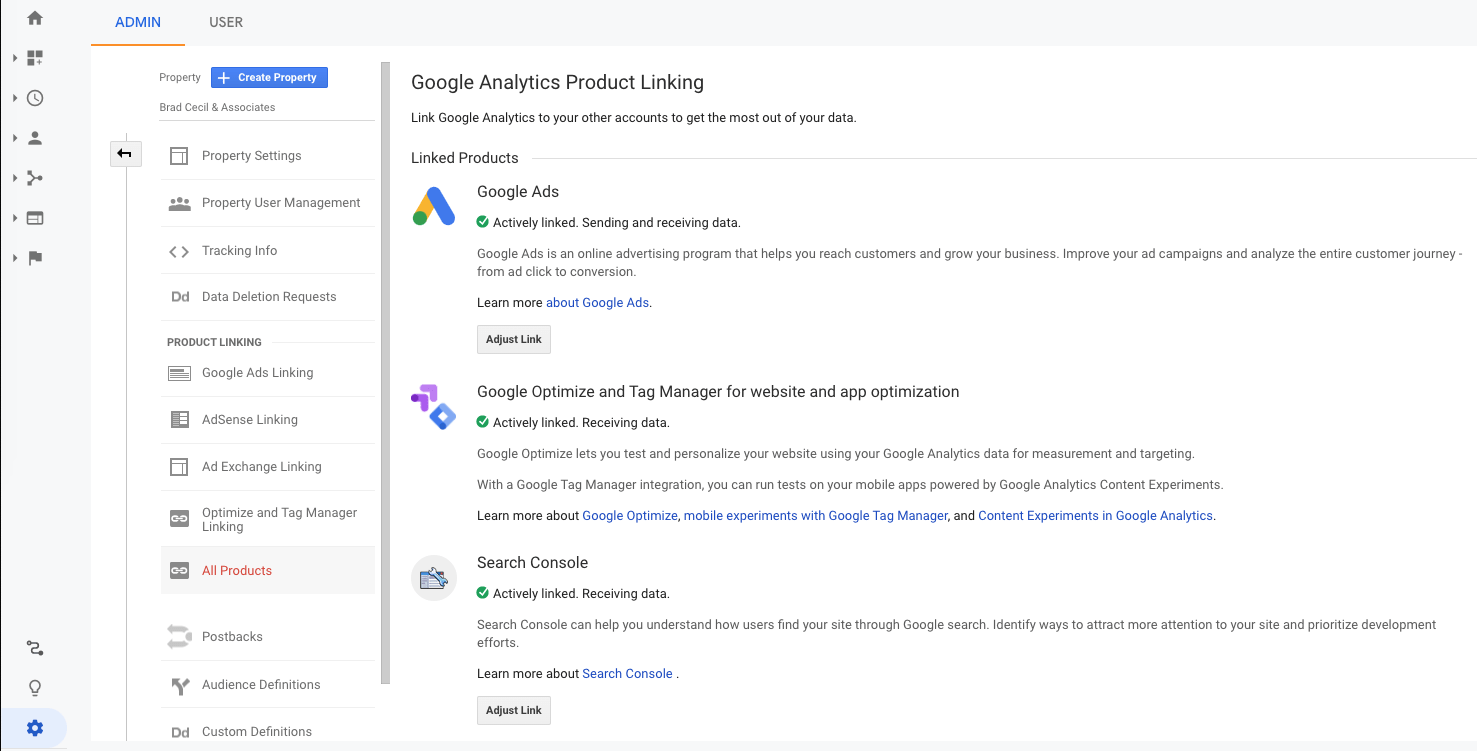
Once you have your GSC created, you’ll want to connect it to your Google Analytics account. Navigate to Admin > Property – Product Linking – All Products > Search Console and select Adjust Link. You will then have the option to add your domain and select the views that are allowed to access it.
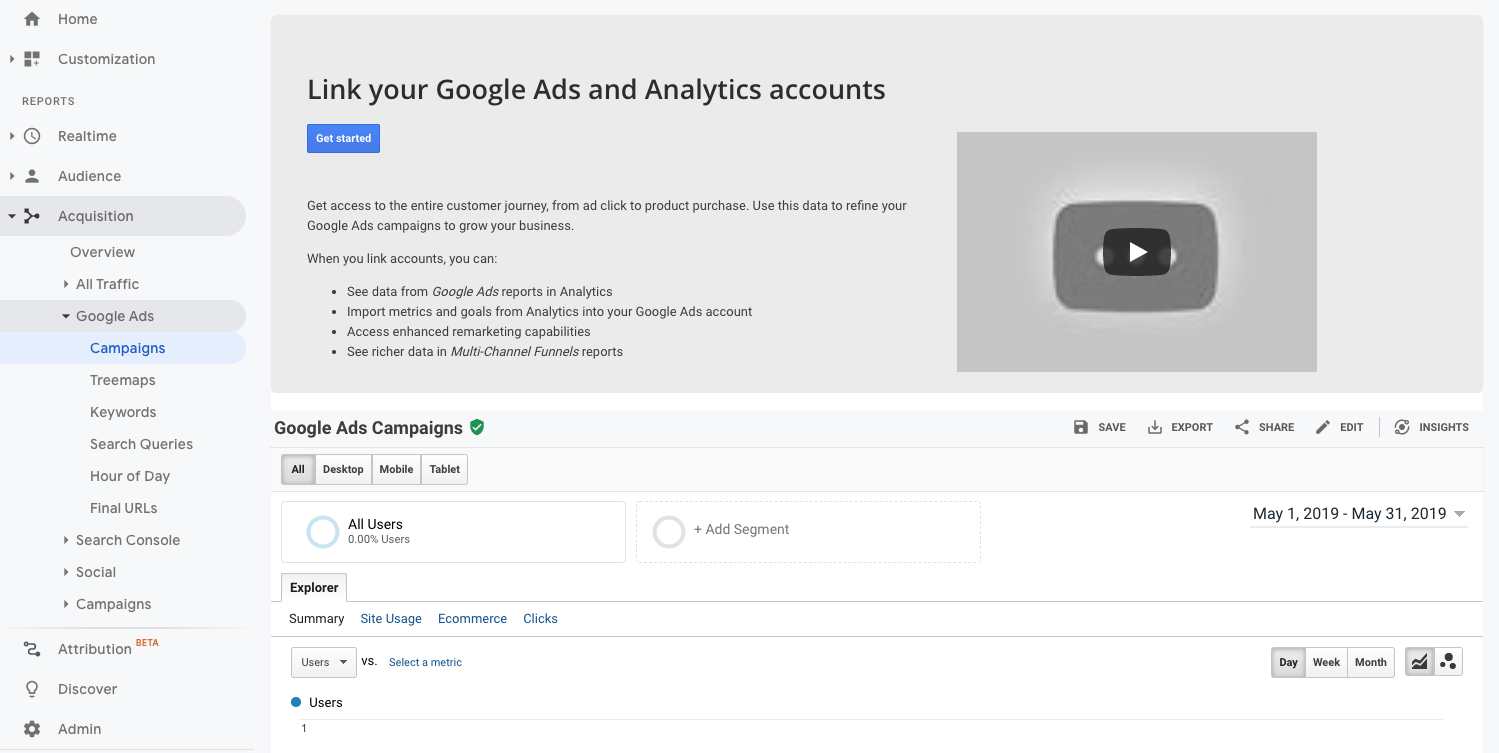
7. Connect Google Ads
If you haven’t connected your Google Ads account to your Google Analytics accounts, then, when you navigate to Acquisition > Google Ads > Campaigns, you will see this message:
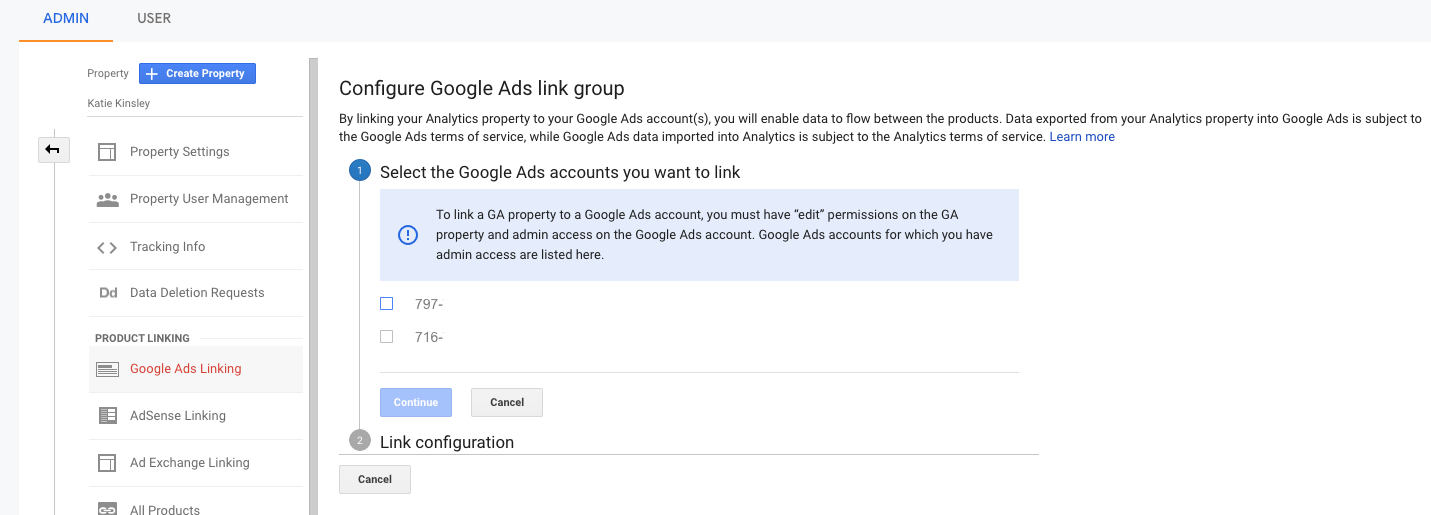
From that view, you can click the Get Started button, or navigate to Admin > Property – Product Linking – Google Ads Linking. To link a GA property to a Google Ads account, you must have “edit” permissions on the GA property and admin access on the Google Ads account.
If you see your account listed, select the box next to the account and click continue.
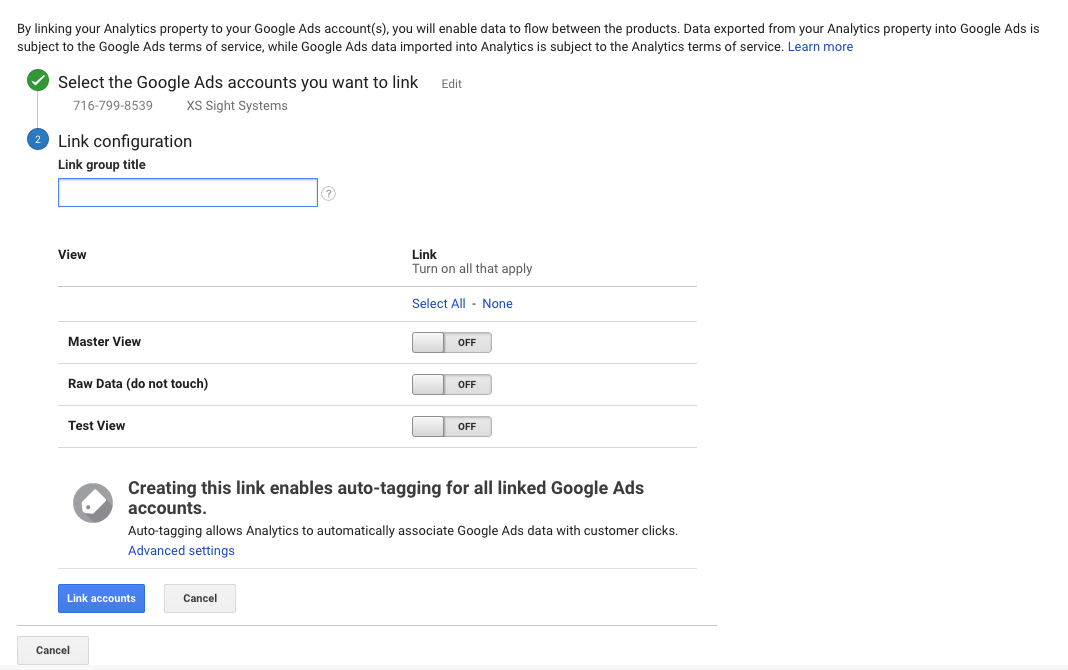
Next, you’ll want to select which views for the Google Ads data to apply to, then click Link Accounts.
If your nonprofit organization isn’t using Google Ads, then I recommend you take a look into the Google Ad Grant. The Google Ad Grant can benefit your nonprofit with up to $10,000 per month of in-kind search advertising from Google. Read more about it here: https://cecilcommunication.com/resource-center/maximize-your-reach-with-the-google-ad-grant/
8. Set Up Ecommerce Tracking
Ecommerce tracking reports allow you to analyze purchase activity on your website. You can see product and transaction information, average order value, conversion rates, time to purchase and other data.
To enable ecommerce tracking on your Google Analytics view, navigate to Admin > View – Ecommerce Settings. From there, you can turn the Enable Ecommerce tracking to ON. This only prepares your Google Analytics account to accept ecommerce data into the view.

You’ll need to contact a web developer or use the ecommerce developer reference guide to properly set up the tracking code for your site.
Conclusion
Google Analytics is an essential tool to any digital marketing program. It allows any organization, big or small, to understand how their audience behaves on their website. By analyzing this data, organizations can tailor a marketing strategy geared toward their audience and allows them to achieve their engagement goals.


One thought on “Google Analytics For Nonprofits: Setting Up Your Account in 8 Steps”